How to Enable DNS over TLS on pfSense with Cloudflare
Typical DNS is unencrypted which can be concerning especially when the traffic leaves your home network, as anyone along the way can read and intercept your DNS queries. The solution to this of course is encrypted DNS via DNS over TLS and DNS over HTTPS. Unfortunately not all devices support DoT or


Typical DNS is unencrypted which can be concerning especially when the traffic leaves your home network, as anyone along the way can read and intercept your DNS queries. The solution to this of course is encrypted DNS via DNS over TLS and DNS over HTTPS. Unfortunately not all devices support DoT or DoH yet and setting it up on a per device basis can be a pain, luckily pfSense can act as a DoT resolver converting your unencrypted DNS traffic to encrypted traffic whilst also making your DNS faster as results are cached locally as well as optionally providing DNS for internal services. Fortunately this is extremely fast and easy to set up and this guide will walk you through that. In this example I will be using Cloudflare as my upstream DNS forwarder as they are the fastest in my area but you can use any DNS provider which supports DNS over TLS just substitute the hostname and server address
1. Add your upstream DNS forwarders
In pfSense head over to System > General Setup and ensure your setting are as follows
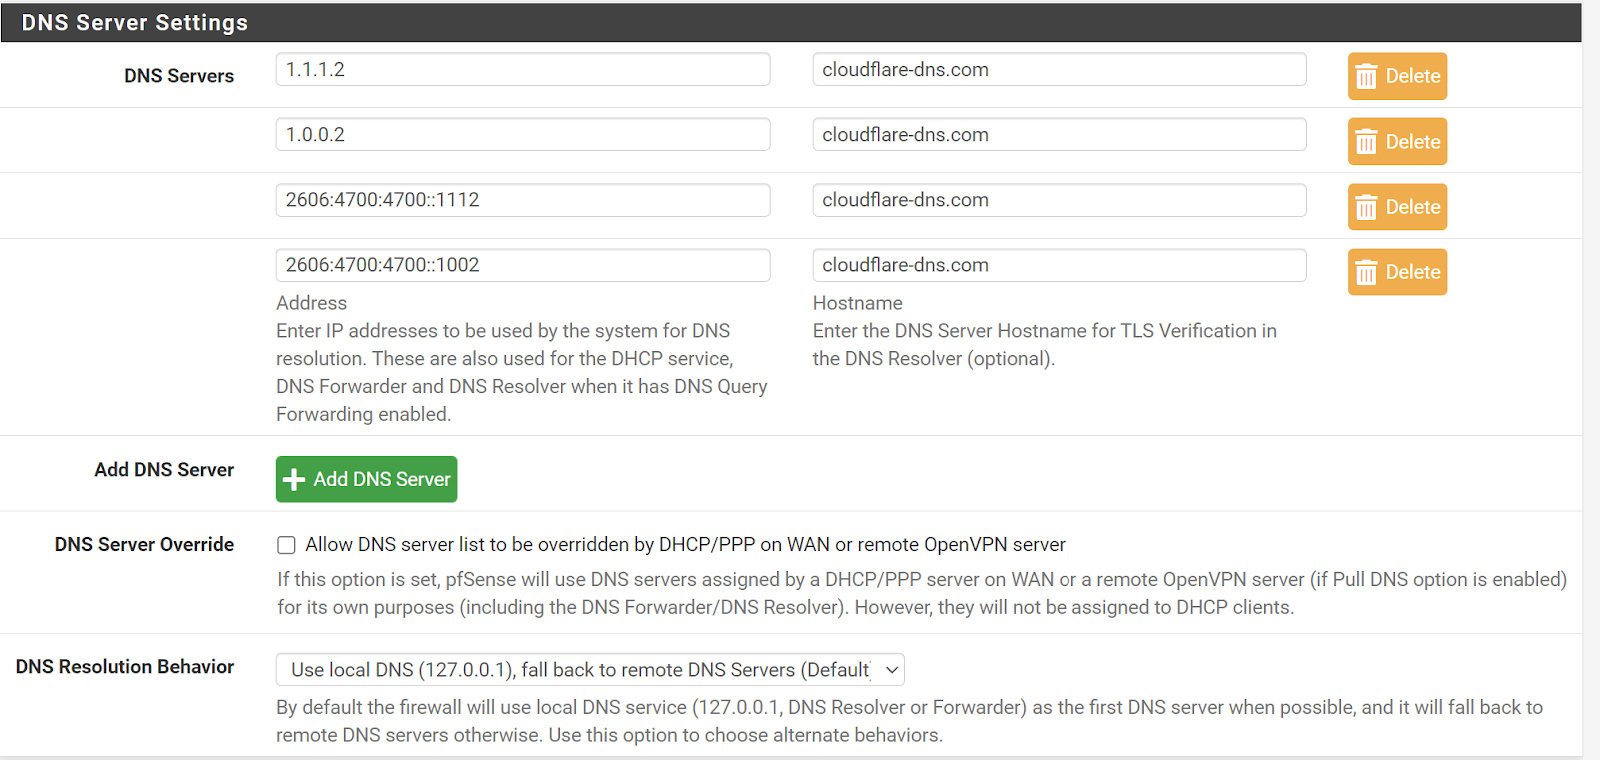
For the DNS Server Hostname I am using the TLS Hostname in the Cloudflare Documentation example `cloudflare-dns.com`
Once complete Save and Apply your settings
2. Setup your local DNS resolver
Now we need to setup the pfSense’s local DNS resolver `unbound`
To do this go to Services > DNS Resolver
Now check, “Enable DNS resolver”
Uncheck, “Enable DNSSEC Support” as this will be handled upstream by Cloudflare
Now check both, “Enable Forwarding Mode”, and “Use SSL/TLS for outgoing DNS Queries to Forwarding Servers”
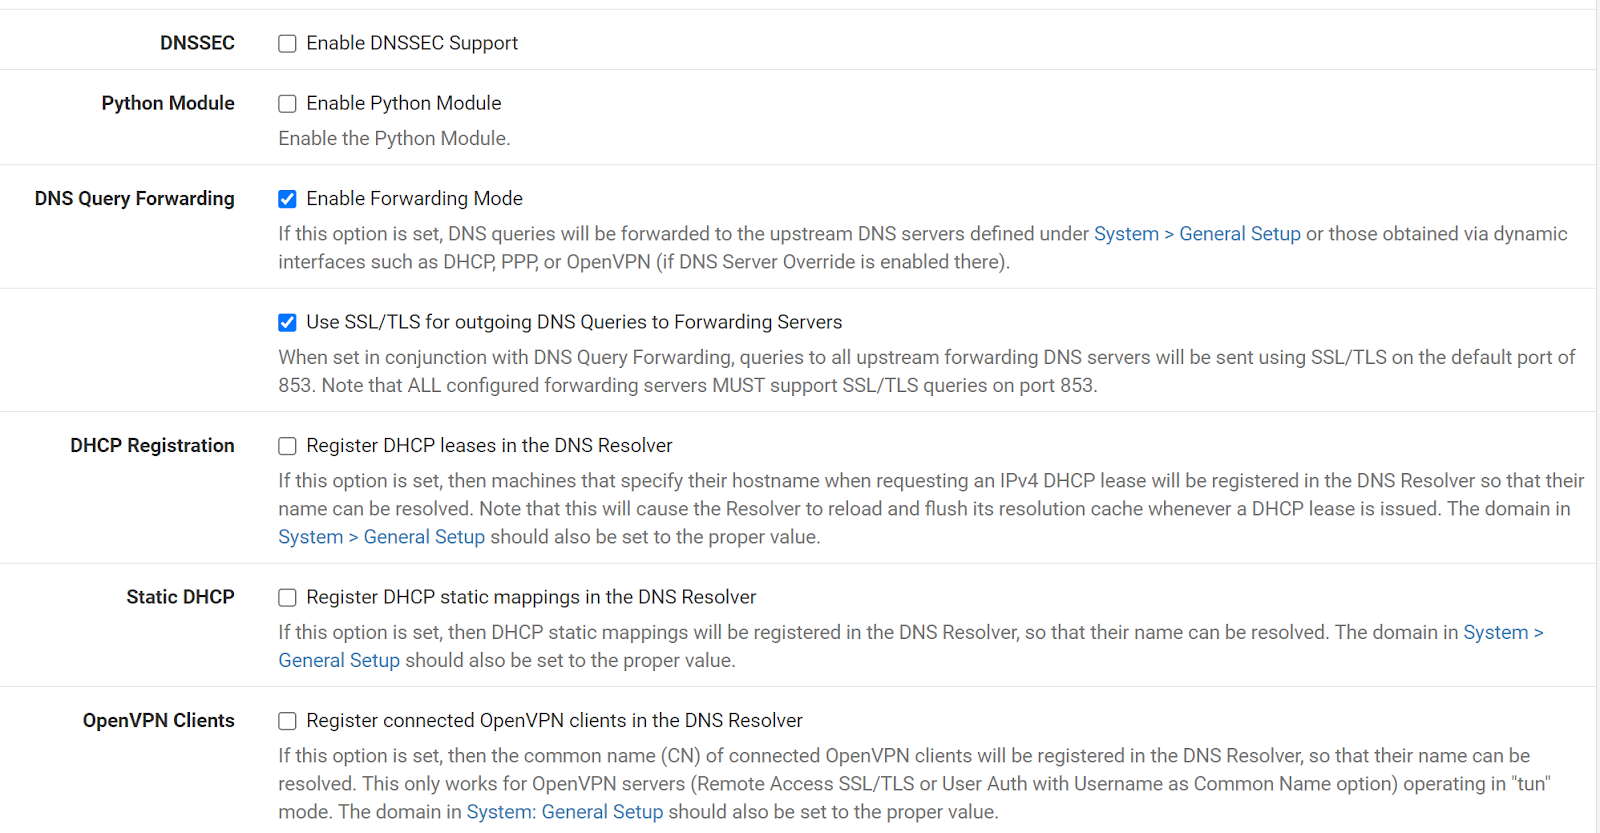
Finally, hit Save and Apply
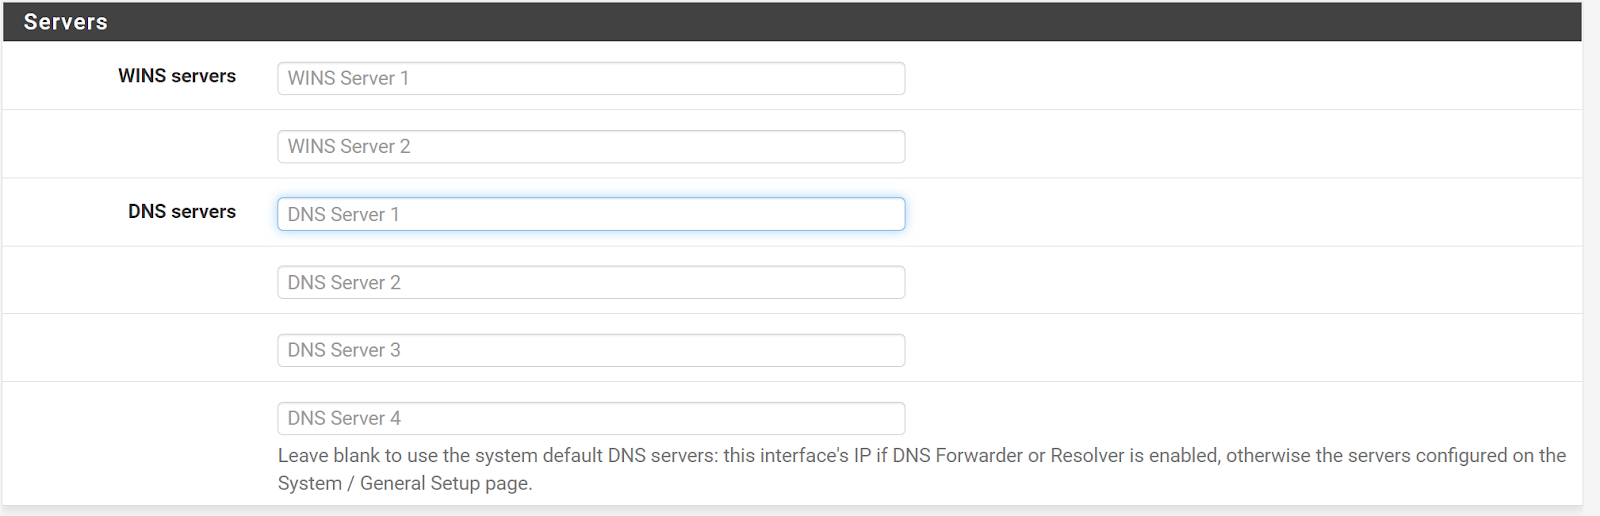
3. Ensure clients are using pfSense as their DNS
Ensure you set all other DNS servers on your network to point to your pfSense machine for their upstream DNS and if you have no other DNS servers ensure the DHCP server on pfSense is configured to push out the IP address of your pfSense machine to clients. pfSense will do this by default if the DNS entries in DHCP are blank.
You can this setting under Services > DHCP Server
4. Test DNS over TLS
Now onto the final step
If you changed your DNS servers in DHCP you will have to renew your lease otherwise you should be good to go. To test simply head on over to https://1.1.1.1/help and ensure “Using DNS over TLS (DoT)” says “Yes''
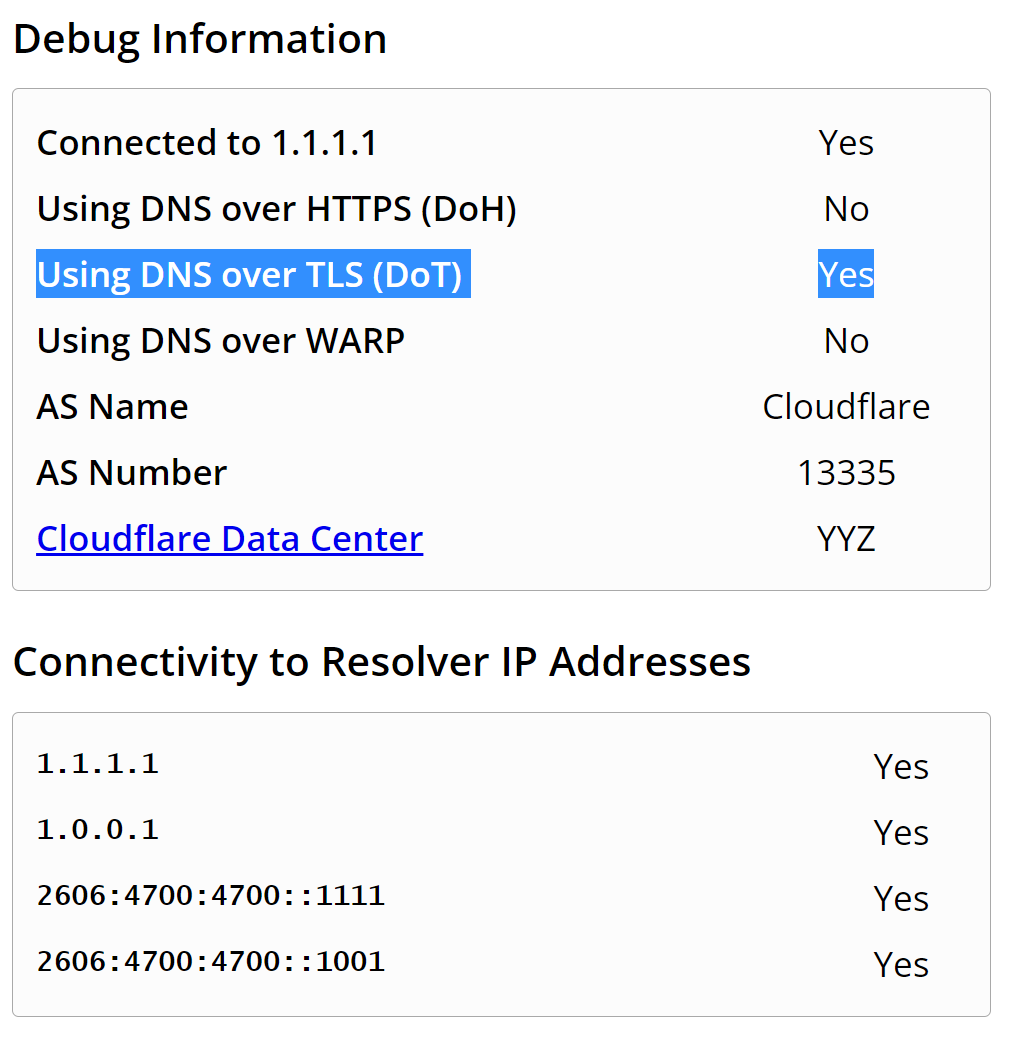
Otherwise, you may have to check your configuration again and/or flush your machine’s DNS cache.
And that’s it, congratulations, you have successfully setup DNS over TLS